Improve Mixing With Volume Automation Techniques in 2023
In music production, achieving a professional mix can be one of the most challenging tasks for artists, engineers, and producers.
A critical factor in perfecting a mix is mastering volume automation techniques.
Volume automation allows you to control track levels throughout different parts of a song precisely, enhancing its overall dynamics and balance.
From subtle adjustments in levels to dramatic sweeps of filters and modulation effects, volume automation can significantly improve your mix and breathe new life into your tracks.
This guide will explore various techniques for using volume automation, helping you create a more polished and compelling final product.
Key Takeaways
- Volume automation is a crucial technique in music production that allows for precise control of track levels throughout different parts of a song, enhancing its overall dynamics and balance.
- Volume automation can significantly improve the balance and clarity of a mix, bringing background elements to the forefront at the correct times and creating space for other instruments to cut through.
- Advanced volume automation techniques, such as automating secondary effects parameters and using sidechain compression, can lead to more intricate sound design and a more immersive listening experience.
Table of Contents
What is Volume Automation?
Volume automation is a mixing technique in music production that involves adjusting the volume levels of individual tracks or elements within a mix over time. This process is precisely controlled by your Digital Audio Workstation (DAW) to create dynamic changes throughout a song or composition.
Implementing volume automation can help achieve a well-balanced mix by making subtle or dramatic volume adjustments, such as accentuating specific elements during certain track parts or compensating for loudness differences between various song sections.
It can also add natural movements and expressiveness to programmed parts in a mix, emulating the dynamics and nuances of a live performance.
There are several ways to apply volume automation in a DAW, the most common of which is using automation lanes or envelopes. These graphical representations allow you to draw, edit, or record changes in volume over time, corresponding to specific musical elements or tracks.
Some standard volume automation techniques include:
- Humanizing programmed parts by adding natural dynamics and subtle volume variations
- Adjusting volume levels during transitions or emphasizing certain sections of a track
- Automating the volume of a specific instrument or sound to draw attention or create space in the mix
- Controlling the dynamics of vocal tracks to retain clarity and balance with other elements in the mix
Overall, volume automation is an essential technique that allows music producers and audio engineers to create dynamic, professional-sounding mixes, bringing life and depth to their compositions.
The Importance of Volume Automation in Mixing
Volume automation is a crucial technique in the mixing process, as it helps create dynamic movement and excitement within a track.
You can enhance the overall listening experience and add depth to your mix through subtle changes in volume levels across different song sections.
One of the main benefits of volume automation is that it allows you to emphasize certain elements in a mix during crucial moments, such as transitioning from a verse to a chorus.
By adjusting volume levels strategically, you can create a sense of contrast between sections and make choruses feel more powerful and engaging (Home Studio Recordings).
Another advantage of volume automation is that it can help improve the balance and clarity of your mix. For example, adjusting volume levels can help bring background elements to the forefront at the correct times, ensuring that each part of the mix gets its moment to shine (Music Guy Mixing).
Volume automation can also be used to manage the energy and emotion of a song. By making subtle adjustments to the volume of various instruments or vocals, you can create a more immersive and emotive listening experience for your audience (Sage Audio).
Finally, volume automation can help you achieve a more polished and professional-sounding mix by allowing you to address inconsistencies in audio recordings, such as fluctuations in vocal performances or varying instrument levels.
Automating volume changes throughout the mix can smooth out these issues and achieve a more consistent sound (LANDR).
Volume Automation Techniques
Volume automation is crucial for achieving a more dynamic and polished mix. It allows you to create nuance and balance throughout your track, ensuring each element is heard clearly.
This section will explore techniques to help you perfect your mix using volume automation.
One common technique is riding the faders.
This involves manually adjusting the volume faders throughout your mix by drawing the automation or recording your fader movements in real-time. This method allows for more precise control over each instrument’s volume and can help prevent overcrowding in the mix.
Musician on a Mission suggests using volume automation to achieve a perfect balance between instruments.
Another technique is using automation modes in your DAW.
According to Waves Audio, there are four standard automation modes: Read, Touch, Latch, and Write.
Each mode serves a different purpose in volume automation, allowing you to create more nuanced mixes. For instance, Touch mode reacts to your fader movements only while your mouse or control surface is in contact with the fader, while Latch mode retains the last fader position until you manually adjust it again.
Mute automation can also create impactful moments in your mix. This involves automating the mute function on specific tracks or sections to emphasize particular elements or create dramatic silences.
Ujam mentions using mute automation in metal subgenres for a cleaner mix and to jar the listener deliberately.
Finally, using auxiliary sends (AUX) and volume automation in parallel can significantly enhance your mix.
Automating the send levels to parallel processing chains like reverb and delay allows you to create dynamic contrast throughout your mix, ensuring that specific instruments or sections are sufficiently highlighted.
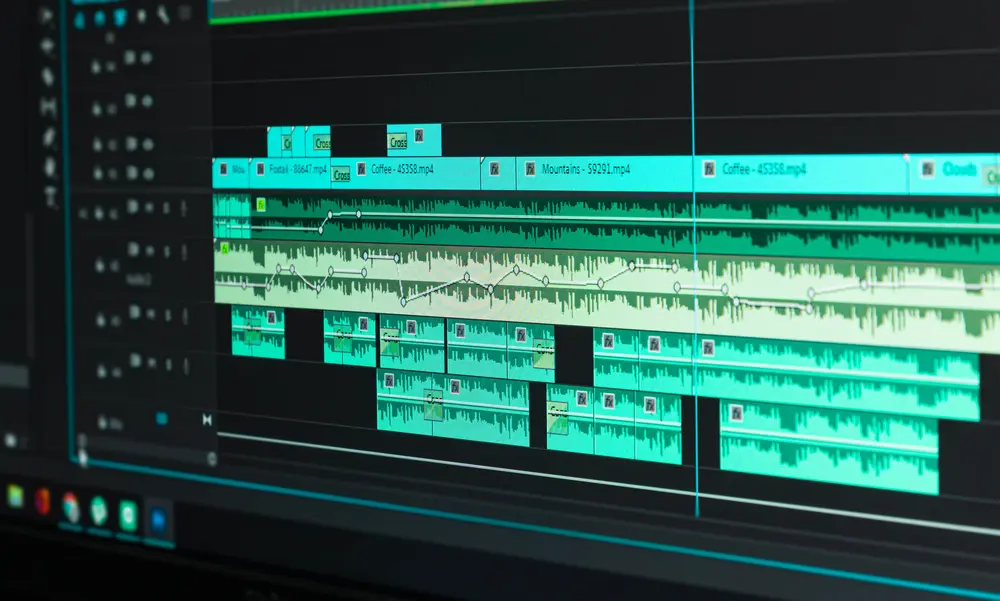
Animating Volume with Envelopes
Volume automation envelopes are an essential tool for improving the dynamics and depth of your mix. These envelopes allow you to control the volume of individual tracks or elements within a track, making it easier to create smooth transitions and add expression to your mix.
The process of using volume envelopes varies depending on the software you use. For instance, in Adobe Audition, you can automate the volume by showing automation lanes in the Editor panel and selecting the parameter to automate. Similarly, Reaper allows users to create volume and pan automation envelopes for different tracks.
Here are a few techniques to help you get started with animating volume using envelopes:
- Setting Keyframes: First, create and adjust keyframes on the envelope line to control the volume at different points in your mix. This helps you effectively shape the volume curve and adds depth to your tracks.
- Fading In and Out: Use volume envelopes to fade in or out individual tracks gradually. This technique can create smoother transitions and prevent sudden volume changes from distracting your listeners.
- Creating Space: If some elements of your mix seem crowded or overwhelming, you can automate the volume to create space for other instruments to cut through. This helps to ensure that each element in your mix has its own sonic space and clarity.
- Emphasizing Certain Elements: When you want to draw the listener’s attention to specific elements, use volume envelopes to highlight those parts in your mix. For example, increasing the volume of a guitar solo or adjusting the volume of a vocal track to make it stand out.
Remember that the key to successful volume automation is subtlety and precision.
Experiment with different techniques based on your mix and find what works best.
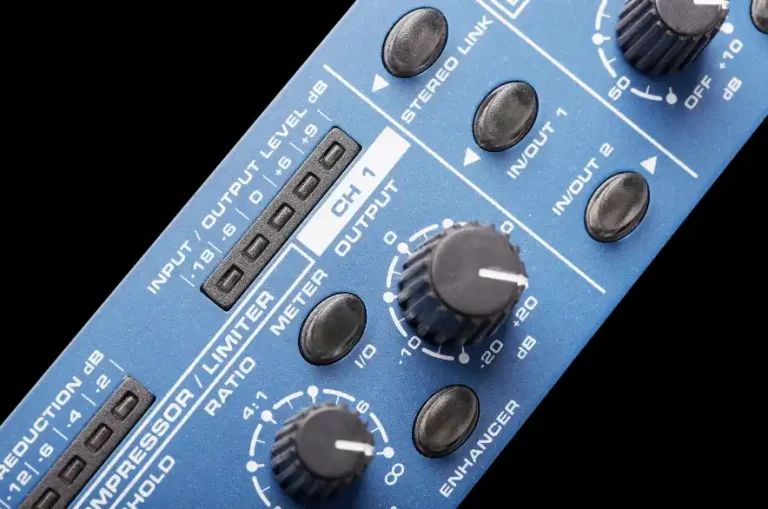
Using Compression for Dynamic Control
A compression is a valuable tool in the mixing process for managing the dynamic range of audio signals.
A compressor functions like an automatic volume knob, turning down the level of an audio signal when it exceeds a certain threshold. This can help balance the overall dynamics of a mix and ensure that individual elements blend well together.
However, it is essential to use compression judiciously to avoid over-compressing and making an instrument or vocal part sound unnatural.
Instead, consider compressing lightly and using volume automation to handle much of the dynamic control. This can lead to a more transparent sound, preserving the natural dynamics of the audio source (Waves Audio).
When using compression, it is crucial to understand the settings and their impact on the audio signal. Key parameters to consider include:
| Parameter | Definition | Impact |
|---|---|---|
| Threshold | The level at which the compressor starts to reduce the audio signal gain. | Signals above the threshold are compressed, while those below are unaffected. |
| Ratio | The gain reduction is applied to the audio signal once it exceeds the threshold and a higher ratio results in more aggressive compression. | A higher ratio results in more aggressive compression. |
| Attack | The time it takes for the compressor to start working once the audio signal exceeds the threshold. | Faster attack times can control transient peaks, while slower times allow transients to pass through. |
| Release | The time taken for the compressor to stop working after the audio signal falls below the threshold. | Choosing the right release time is essential to avoid a “pumping” effect or unnaturally long gain reduction. |
In addition to regular compression, sidechain compression techniques can provide more creative control in the mix. For instance, sidechain compression can create space for a kick drum by ducking the bass level whenever the kick hits (iZotope).
Overall, compression for dynamic control is an essential technique for perfecting a mix. Combine light compression settings with volume automation to achieve a natural and harmonious balance of elements in the mix.
Automation Lanes and Drawing Tools
Automation lanes are crucial in executing precise volume adjustments throughout the mix.
They are timeline-specific, allowing for automated edits as the mix progresses.
In the past, engineers had to “ride the fader” manually for adjustments, but automation lanes have made it much easier and more efficient.
To work with automation lanes, follow these steps:
- Create an automation lane for each track you want to automate. This is usually done by clicking on the track header and selecting “Create automation lane” from the context menu.
- Select the parameter to automate, such as volume.
- Choose the automation mode (Read, Touch, Latch, Write) to determine how the changes are applied to the mix. This can be done from the automation panel within your DAW.
- Use drawing tools to create and edit automation points in the lane. Depending on your DAW, this may include Pencil, Line, Square, or other tools.
- Apply curves or shapes to the automation points for smoother transitions and movement throughout the mix.
Drawing tools assist in creating precise automation points and curves within the automation lanes.
The Pencil tool allows users to draw freehand curves, while the Line tool creates straight lines between points, ideal for sudden volume changes.
The Square tool generates square-shaped curves, which are helpful for more abrupt adjustments.
When working with automation lanes and drawing tools, finding the best technique and tools for your specific mix is essential, as every project has unique requirements.
Remember to keep revisiting the automation throughout the mixing process, as even minor adjustments can significantly impact the overall sound.
Creating Natural Volume Transitions
One of the key aspects of perfecting your mix is creating smooth and natural volume transitions. This can help your music maintain its dynamic energy and keep listeners engaged throughout the song.
To achieve these smooth transitions, begin by identifying the essential sections of your song, such as the intro, verse, chorus, and bridge.
Pay close attention to how the volume levels change between these sections, and use automation techniques to adjust accordingly.
Here are a few tips to help you create natural volume transitions:
- Use subtle changes: Ensure your volume adjustments are subtle to avoid unnatural-sounding transitions. You can push the volume up or down by a couple of dB, ensuring a smoother blend between various sections of the song.
- Automate track volumes: Almost every parameter in your mix, including track volumes, can be automated. In the analog era, engineers would manually play the mix on the faders in real-time. Today, you can use digital audio workstations (DAWs) to apply smooth automation to your tracks.
- Focus on vocal levels: The vocal track serves as the centerpiece of most songs, so keeping its level in balance is crucial. Automation is one of the most precise ways to achieve this, and it helps in mastering your vocal levels.
- Highlight transitions with effects: Besides volume automation, consider using reverb or delay to create natural-sounding transitions. These can emphasize certain song elements or add extra depth to the mix.
Remember, volume automation ensures a seamless listening experience throughout your mix.
By focusing on natural transitions, your mix will maintain its dynamic energy and keep listeners engaged from start to finish.
Advanced Volume Automation Techniques
As you progress in your mixing journey, exploring advanced volume automation techniques is vital to refine your mix further. These techniques can help you create dynamic and nuanced soundscapes that breathe life into your tracks.
There are advanced techniques in the automation modes like Read, Touch, Latch, and Write. Each mode offers a different level of control and flexibility when applying volume automation:
- Read: This mode simply reads the automation data you created without allowing for any real-time adjustments.
- Touch: In this mode, any changes made to volume faders will be recorded only when they are adjusted and will revert to their original position once released.
- Latch: Similar to Touch mode, Latch records adjustments to volume faders but keeps the changes even after releasing the fader.
- Write: Write mode overwrites any previous automation data and records all volume fader movements.
Another advanced technique is automating secondary parameters of effects, such as filter resonance, cutoff frequency, and modulation depth. This can lead to more intricate sound design and help create a more immersive listening experience.
Lastly, consider experimenting with sidechain compression to achieve volume-ducking effects. By linking one track’s volume to another’s input level (typically a kick drum), you can create a “pumping” effect, a widespread technique in electronic dance music.
By exploring these advanced volume automation techniques, you can further perfect your mix and develop a more professional and polished sound.
Conclusion
Volume automation is an essential technique when it comes to perfecting your mix. Utilizing this approach allows you to achieve a polished and dynamic sound, enhancing your music’s emotional impact and overall quality.
Some critical aspects to consider when applying volume automation include the following:
- Precise control of your track levels.
- Adjusting the volume for different song sections.
- Balancing the relationship between instruments.
- Accentuating important moments and elements.
- Controlling the overall song dynamics through master bus volume automation.
Remember to be subtle and intentional with your automation, focusing on improving the mix without causing undesirable side effects. Moreover, remember that you can also automate other effects, like EQ, compression, and reverb, for greater control over your mix.
Incorporating volume automation techniques in your mixing process takes time and practice, but the results will be rewarding, leading to mixes with greater clarity, depth, and sonic interest. Happy mixing!
Frequently Asked Questions
What are the key steps for applying volume automation in a mix?
To apply volume automation in a mix, begin by identifying sections of your track that require dynamic adjustment.
Listen carefully for any inconsistencies, imbalances, or areas where you need to emphasize or de-emphasize specific elements.
To achieve the desired results, you should zoom in until the waveform is visible, and then draw a fast volume-automation fade below the plosive. It may be necessary to experiment with the angle of the fade.(source).
How can automation techniques enhance vocal tracks?
Automation techniques work wonders for enhancing vocal tracks, helping to maintain a consistent level of the singer’s performance. It can also reduce popped consonants, plosives, and sibilance.
When automating before compression, you’re feeding the compressor a more consistent signal, resulting in a smoother vocal sound (source).
What are some common applications of automation in music production?
Automation is primarily used to control parameters such as gain, panning, effects levels, and EQ adjustments across the timeline of a mix.
This process enhances the mix by creating contrast and balance between the elements, giving your mix forward motion and making it more engaging for the listener (source).
How does volume automation differ between DAWs like Logic Pro and Pro Tools?
While the concept of volume automation remains the same across different DAWs, the interface and workflow may differ.
Both Logic Pro and Pro Tools provide powerful automation tools for controlling volume adjustments, but the visual layout, curve drawing, and editing methods might vary.
Familiarize yourself with the specific DAW you are working with to make the most of its automation capabilities.
How can automation contribute to a well-balanced mix?
Automation aids in fine-tuning the balance of your mix, providing precise control over different elements at various points in time.
By automating volume and effects levels, you ensure that no single element dominates or gets lost in the mix. This contributes to a clearer, more cohesive, and more professional-sounding mix (source).
What are the best practices for using automation to control dynamics?
To control dynamics effectively with automation, start by planning your automation moves ahead of time and deciding on the key moments that require adjustments.
In most cases, less is more, so try subtle adjustments first. Focus on consistency and contrast between different sections of the mix.
Do not over-automate, as it might make your mix sound over-processed. Gaining experience and practicing with automation will help you know when and how to apply it for the best results.