How does Compression Work in Audio Engineering?
Compression in audio engineering is a fascinating and essential technique that allows sound engineers and musicians to control the dynamic range of their audio recordings, ensuring a more balanced and pleasing listening experience. This process involves reducing the level of an audio signal when it rises above a specified threshold, resulting in a consistent level across various sections of a track.
The way compression works might initially seem counterintuitive, as it’s often perceived as a way to make things louder when, in reality, it makes things quieter by attenuating loud transient peaks.
With a firm grasp on the essentials of audio compression, you’ll be able to better understand its crucial role in the recording and mixing process, especially when it comes to maintaining a consistent sound throughout a piece of music.
Now that we’ve introduced this topic, let’s discuss some key elements that make compression work effectively in audio engineering.
Firstly, the dynamic range of an audio signal is crucial, which refers to the difference between the loudest and quietest moments of a signal.
Secondly, the use of specific compression parameters, such as threshold, ratio, attack, and release, can help shape the overall sound and maintain proper levels throughout an audio track.
Key Takeaways:
- Compression in audio engineering controls the dynamic range by reducing the level of loud signals.
- Compression works to make things quieter, not louder, by attenuating transient peaks.
- A solid understanding of dynamic range and compression parameters is vital for successful audio mixing.
Table of Contents
Fundamentals of Audio Compression
Dynamic Range
In audio engineering, compression is a technique that allows you to control the dynamic range – which is the difference between the loudest and quietest moments of an audio signal 1. By reducing the dynamic range, you’re able to achieve a more balanced and consistent sound. This is especially useful in music production, mixing, and mastering 2.
Imagine you’re listening to a song with a massive difference in volume between the instruments and vocals. Compression helps to level out these fluctuations, making the listening experience smoother and more enjoyable.
Threshold and Ratio
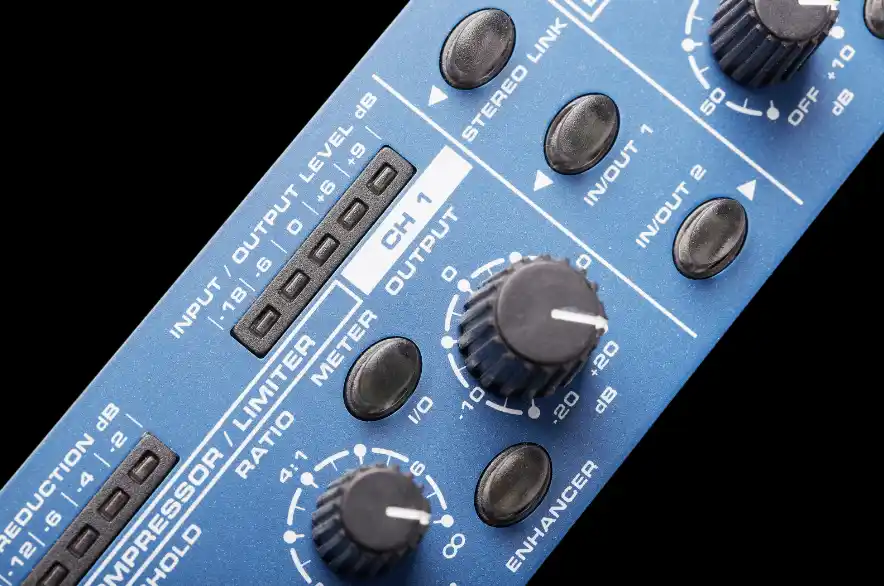
The two key parameters in audio compression are threshold and ratio 3. The threshold is a specified volume level. When audio levels exceed this threshold, compression kicks in to reduce the signal level. The ratio determines how much compression is applied to the audio signal once it exceeds the threshold. For example, a 4:1 ratio means that for every 4dB the audio exceeds the threshold, and the output level only increases by 1dB 4.
Hold on for an example: If you set the threshold at -10dB and the audio signal peaks at -6dB, your audio is 4dB over the threshold. With a 4:1 ratio, the audio output will be only 1dB louder. The end result is a more even, controlled sound!
Attack and Release
Attack and release are timing parameters in audio compressors 5. Attack sets the time it takes for the compressor to start working after the audio signal exceeds the threshold. Conversely, the release time determines how quickly the compressor stops working once the signal falls below the threshold.
To put it in perspective, think of attack and release like the human response to a sudden noise – attack measures how quickly you cover your ears, and release measures how soon you uncover them.
| Parameter | Function | Example |
|---|---|---|
| Attack | Time to engage compression | Fast attack: compress drums |
| Release | Time to disengage compression | Slow release: preserve sustain |
Knee
Lastly, we have the knee parameter. The knee defines how the compressor transitions from no compression (below the threshold) to full compression (above the threshold) 6. A “hard knee” defines a sudden transition, whereas a “soft knee” provides a smoother and more gradual transition.
Here’s a list of common uses for hard and soft knees:
- Hard knee: Drums, percussion, and transient-heavy material
- Soft knee: Vocals, guitars, and other sustain-focused instruments
Considering all aspects of audio compression helps you make informed decisions, leading to better-sounding mixes and recordings. Remember to experiment with different settings in order to achieve the perfect balance for your specific project!
Footnotes
Types of Compressors
In the world of audio engineering, understanding compression is crucial. This section will explain the different types of compressors and how they work.
Opto Compressor
The Opto Compressor is a unique type of compressor that uses an optical element and a light source to control the compression. This results in smooth and natural-sounding compression, perfect for vocals and acoustic instruments. The LA-2A is a famous example of an opto compressor.
The optical element is basically a light-sensitive resistor. As the input signal’s level increases, the light source glows brighter, and the resistor changes its resistance—resulting in compression. Opto compressors are known for their slow and smooth attack and release times, giving your audio an organic feel.
VCA Compressor
Next up: the VCA Compressor. Voltage Controlled Amplifiers, or VCAs, offer precise control over their attack and release time. This makes them versatile and suitable for various applications, from drums and bass to entire mixes. Their transparent sound allows you to shape the dynamics without altering the character of the audio.
VCA compressors utilize a voltage-controlled amplifier circuit to change the gain of the input signal based on the amount of compression. This design offers a wide range of compression settings, giving you the flexibility to use it in different scenarios.
FET Compressor
FET Compressors are known for their fast attack and release times, making them ideal for adding punch and coloration to your sounds. As the name suggests, these compressors use a Field Effect Transistor to determine the amount of compression applied.
The fast response of a FET compressor can add excitement to your tracks, accentuating transients and giving them more clarity. They’re often favored for percussive instruments and guitar recordings, where maintaining the natural attack is crucial.
Tube Compressor
Finally, we have the Tube Compressor. These compressors use vacuum tubes in their gain stage, which imparts a warm, rich character to the audio. With slower attack and release times, tube compressors are known for their vintage sound.
Popular since the 1950s, tube compressors are often considered “colorful” and can add harmonics to your mix. They may not always be the go-to choice for transparency, but if you’re looking for that warm characteristic, a tube compressor might be exactly what you need.
In conclusion, here’s a list of the four main types of compressors:
- Opto Compressor
- VCA Compressor
- FET Compressor
- Tube Compressor
Each type of compressor has its strengths and characteristics, allowing you to choose the one that works best for your specific audio needs.
Applications in Music Production
Mixing
In the mixing stage of music production, compression plays a crucial role in controlling the dynamics and thus achieving a more balanced and consistent sound. It allows you to manage the audio signals by reducing the dynamic range – the difference between the loudest and softest parts of a track, thereby making everything sound more cohesive and polished 1.
For example, when you have a vocal present in your mix that is varying in volume, using a compressor helps to tame the loud parts and raises the soft parts, creating a more evenly balanced performance 2. This can be especially helpful when working with multiple instruments and vocals, allowing them to blend seamlessly together without any one element overpowering the others.
Mastering
Mastering is the final stage of music production, and compression is often used here to create a cohesive and polished sound throughout an entire album or collection of tracks. In this stage, compression’s main purpose is to give the track a sense of perceived loudness without causing distortion or clipping 3.
By using a compressor in mastering, you can make subtle adjustments to the overall dynamics and ensure that all the tracks on an album have a similar volume and feel, creating a consistent listening experience for your audience.
Recording
During the recording stage, compression can be applied to instruments and vocals to achieve better control over the dynamics and consistency of the recorded audio signal4. When used correctly, it can help prevent distortion or clipping due to sudden loud peaks and maintain a more uniform volume and presence of the recorded sound.
For example, a vocalist with a broad dynamic range may fluctuate between soft and loud passages within a song. Applying a compressor during the recording process can help manage these dynamics, ensuring that the soft parts don’t get lost and the loud parts don’t become overwhelming5.
To further illustrate the importance of compression in various aspects of music production, here’s a brief list of its applications:
- Controlling volume fluctuations in vocals and instruments
- Adding punch and power to drums, bass, and guitar
- Enhancing sustain for stringed instruments
- Preventing distortion or clipping in the recording stage
By understanding how compression works and applying it effectively in your music production, you can enhance the overall consistency, balance, and polish, ultimately creating a more engaging and enjoyable listening experience. Remember to stay humble and be patient while mastering the art of compression, as it can take time and experience to get the desired results.
Footnotes
-
https://musicproductionnerds.com/audio-compression-the-compressor-in-music-production ↩
-
https://producerhive.com/music-production-recording-tips/understanding-compression-for-dummies/ ↩
-
https://online.berklee.edu/takenote/what-does-a-compressor-do-in-music/ ↩
-
https://www.izotope.com/en/learn/audio-dynamics-101-compressors-limiters-expanders-and-gates.html ↩
Working with Specific Instruments and Vocals
When working with compression in audio engineering, the way you approach specific instruments and vocals can differ significantly. It’s essential to understand the best practices when compressing guitars, vocals, and drums. Remember, the goal is to achieve a well-balanced and consistent sound.
Guitar
Guitar compression can help refine your sound, bringing out the nuances of your playing while also maintaining a consistent level. Acoustic and electric guitars can benefit significantly from compression, as it can even out the performance’s dynamic range. Here are some guidelines for compressing a guitar:
- Threshold: Start with a mild threshold, around -12dB to -10dB, and adjust as needed.
- Ratio: Keep it moderate, around 4:1 or 5:1, to avoid over-compression.
- Attack: Set a slower attack time (e.g., 25ms) to let the transient pass through and preserve the guitar’s natural pluck.
- Release: Adjust the release time to match the tempo and rhythm of the song (e.g., 100ms for a medium-tempo track).
Vocals
Vocals often require compression to help them sit appropriately in the mix, preventing them from sounding too loud or too quiet compared to the other instruments. When compressing vocals, pay close attention to gain, ensuring the vocalist’s dynamics are maintained as they sing. Some tips for vocal compression:
- Threshold: Start with a moderate threshold around -12dB, adjusting as needed.
- Ratio: Use a gentle ratio of around 3:1 or 4:1 to avoid over-compression and maintain a natural sound.
- Attack: Set a fast attack time (e.g., 10ms) to catch sudden loud sounds.
- Release: Keep the release time somewhat short (e.g., 50ms) to ensure the compressor releases before the next phrase begins.
Drums
Drum compression is essential for achieving a polished and powerful sound in your mix. Compression can help to shape the drum’s transient, control the overall levels, and add punch to the drum sound. Strategies for compressing drums vary depending on the type of drum, but some general guidelines include:
- Threshold: Set the threshold to achieve the desired amount of compression; for example, -12dB for a subtle effect or -8dB for more aggressive compression.
- Ratio: Use a higher ratio (e.g., 6:1) to control the drum sound or a lower ratio (e.g., 3:1) for a more natural and dynamic sound.
- Attack: Adjust the attack time to preserve the drum’s transient (e.g., 10ms for a snare, 20ms for a kick).
- Release: Set the release time to match the drum’s decay and rhythm (e.g., 100ms for a snare, 150ms for a kick).
Keep these guidelines in mind when working with specific instruments and vocals in your mix. Compression can help you create a balanced mix that sounds cohesive, polished, and professional.
Creative Techniques in Audio Compression
In the world of audio engineering, compression is essential for controlling the dynamic range and achieving a professional sound. Let’s dive into some creative techniques that can help you enhance your mix using compression.
Parallel Compression
Parallel compression, also known as New York Compression, is a technique where you blend an uncompressed signal with a heavily compressed version of the same signal. This allows you to maintain the natural dynamics of the original track while benefiting from the boosted loudness and sustain provided by the compressed version. Using parallel compression can make your drums punchier and help vocals cut through the mix, without affecting their natural dynamics too much1. Here’s how you can set up parallel compression:
- Create a duplicate of the track you want to process
- Apply heavy compression to the duplicate track
- Blend the compressed track with the original by adjusting the volume fader
Sidechain Compression
Sidechain compression is another powerful technique that can create more space and clarity in your mix.
By using a compressor’s sidechain input, you can control the compression of one track based on the level of another2. This is particularly useful in making sure that important elements, such as vocals or kick drums, are not masked by other tracks.
Here’s a simple example of using sidechain compression in your project:
- Add a compressor to the track you want to control (e.g., a bassline)
- Activate the compressor’s sidechain input and set it to be triggered by another track (e.g., a kick drum)
- Adjust the compressor’s threshold, ratio, and other settings until you achieve the desired effect
Common uses of sidechain compression include:
- Ducking the bassline when the kick drum hits to create more space in the mix
- Reducing the level of backing tracks when the lead vocal comes in
- Creating rhythmic effects by pumping the volume of a pad or other elements in sync with the beat
| Technique | Type | Example |
|---|---|---|
| Parallel compression | Blending uncompressed & compressed signals | Adding punch to drums, enhancing vocals |
| Sidechain compression | Controlling compression based on another track | Creating space for vocals, rhythmic effects |
With these two creative techniques, you can experiment and achieve a more polished sound in your mixes. Remember to trust your ears and have fun exploring the world of audio compression!
Footnotes
Additional Tools and Plugins
In audio engineering, compression plays a significant role. However, it is just one of the many tools and plugins that can be used to shape and refine a mix.
This section will provide an overview of some commonly used additional tools, such as limiters, EQs, delays, and reverbs.
Limiter
A limiter is an essential tool to prevent distortion or clipping in your mix. It works similarly to a compressor but with a crucial difference: a limiter sets a maximum output level and prevents the signal from exceeding it. This helps to ensure consistent loudness and protect your audio from distortion.
Some popular limiter plugins include the FabFilter Pro-L and Waves L1 Ultramaximizer1.
EQ
Equalization (EQ) is another fundamental tool in audio engineering. It allows you to adjust the balance of various frequency components within a sound, effectively enhancing or reducing certain frequencies2. This can help to remove any unwanted elements, bring out specific characteristics of a sound, or fix clashing frequency ranges between different tracks. There are many EQ plugins available, both as built-in options in your DAW and as third-party VSTs.
Delay
Delay is an effect that adds echoes, or repetitions, of a sound in varying amounts and at different times. This can create a sense of space and depth in your mix, making it more engaging and dynamic. Depending on the type of delay used, you can achieve simple single echoes, multiple echoes, or complex rhythmic patterns. Some popular delay plugins include Soundtoys EchoBoy, Waves H-Delay, and ValhallaDelay3.
Reverb
Reverb simulates the natural reflections of sound in spaces like rooms, halls, or stadiums. It adds ambiance and depth to your mix, making it feel more immersive and lifelike.
Reverbs come in many types, including spring, plate, and algorithmic, each with its unique qualities4.
Some well-known reverb plugins are the Valhalla VintageVerb, Universal Audio EMT 140 Plate, and the Waves Abbey Road Chambers.
Here’s a list of these additional tools for your reference:
- Limiter
- EQ
- Delay
- Reverb
| Tool | Usage | Example Plugin |
|---|---|---|
| Limiter | Prevent distortion and set maximum output level | FabFilter Pro-L |
| EQ | Adjust frequency balance and enhance/reduce certain frequencies | Waves H-EQ |
| Delay | Add echoes, space, and depth | Soundtoys EchoBoy |
| Reverb | Simulate natural reflections in different spaces | Valhalla VintageVerb |
Remember that each of these tools plays an essential role in shaping your mix. Try experimenting with different combinations to find the perfect sound for your project.
Footnotes
Common Challenges and Solutions
Distortion
When working with audio compression, distortion can be a common challenge. It often occurs when the compressor’s settings are too aggressive or the input signal is too loud. To avoid unwanted distortion, you can follow some simple guidelines:
- Pay attention to gain reduction levels; if they are too high, adjust the threshold or ratio to reduce the compressor’s impact on the audio signal.
- Adjust the attack time and release time to prevent abrupt changes in audio levels that might cause distortion.
- Use makeup gain cautiously, as increasing the audio level post-compression can reintroduce distortion.
Sibilance
Sibilance, or harsh “s” and “sh” sounds, can be another issue when compressing audio. It typically occurs when the compressor is too responsive to high frequencies. Use these tips to address sibilance:
- Consider using a de-esser – a specialized compressor designed to handle sibilance without overly compressing other parts of the audio signal.
- Experiment with the compressor’s attack and release settings to find a balance that minimizes sibilance without causing unwanted artifacts.
To keep track of common compression parameters and their impact, you can refer to the table below:
| Parameter | Impact on Audio |
|---|---|
| Threshold | Sets the level above which compression occurs |
| Ratio | Determines how much compression is applied |
| Attack Time | Controls how quickly compression starts |
| Release Time | Controls how quickly compression stops |
| Makeup Gain | Applied after compression to adjust volume |
Remember, tackling these common challenges ultimately depends on your individual audio source and desired outcome. Experimenting with different settings and techniques will help you find the best solution for your project.
Tips for Achieving the Desired Sound
Adding Punch
To add punch to your mix, consider focusing on percussive elements like kick and snare drums. A more aggressive use of compression can help create this effect. Set a slow attack time, allowing the initial attack (the transient) to pass uncompressed, and combine it with a low threshold and high ratio for a more significant gain reduction (6-12dB) source. This technique accentuates the impact of your drums and results in a more energetic, powerful sound.
Presence
To give your vocals or instruments more presence in the mix, try using a compressor with a faster attack time and a moderate ratio. It helps make the sounds more upfront and polished. Experiment with different combinations of attack and release times, and listen carefully to how it affects your audio. Also, adjusting the threshold can help you strike the ideal balance between compression and dynamics. Remember, moderation is key when aiming for presence. Too much compression might lead to a flattened and lifeless sound.
Attenuating
Sometimes, you might want to attenuate or minimize certain elements in your mix, making space for other sounds. This technique is called ducking. To achieve this effect, you can use sidechain compression, which triggers the compression based on the level of another sound. For example, you could sidechain a bassline to the kick drum, causing the bass to be compressed whenever the kick hits. It creates a more balanced mix and allows the kick to really shine.
Key Compression Parameters:
| Parameter | Purpose |
|---|---|
| Threshold | Sets the signal level at which the compressor starts to work. |
| Ratio | Determines the amount of compression applied to the signal. |
| Attack | Controls how fast the compressor starts to compress the signal. |
| Release | Controls how quickly the compressor stops compressing. |
| Knee | Determines the sharpness of the compressor’s action. |
In conclusion, experiment with different compressor types and settings to find the best fit for your mix. Keep in mind the concepts of adding punch, creating presence, and attenuating certain elements. Above all, trust your ears and don’t be afraid to try new techniques. Happy mixing!
Monitoring and Metering the Compression
Input Gain
Before diving into the specifics of compression, it’s important to ensure proper monitoring and metering of the audio signal. The first step is to adjust the input gain. This is the amplitude at which the audio signal enters your compressor. Properly setting the input gain prevents any unwanted distortion or noise that could occur due to overloading the compressor’s internal circuitry. To set the input gain, watch the input meter while playing the loudest part of your audio, and adjust the level until it reaches the desired dB – typically, just below the compressor’s threshold.
Output Gain
Once the input gain is set, you’ll want to focus on the output gain. During compression, the dynamic range is reduced, which means that the overall volume might become lower. Output gain allows you to compensate for this loss of volume and achieve the desired level. To set the output gain, compress your audio signal and then adjust the output level until it reaches the desired loudness without causing any distortion or clipping.
Gain Reduction Meter
A critical tool in monitoring the compression process is the gain reduction meter. This meter displays the amount of gain reduction being applied by the compressor in real time.
By keeping an eye on this meter, you can quickly assess the amount of compression taking place and make adjustments to the various compression parameters, such as threshold, ratio, attack, and release.
Below is a brief list covering some of the key points about monitoring and metering the compression:
- Adjust input gain to prevent distortion or noise
- Set output gain to compensate for volume loss during compression
- Monitor gain reduction meter to assess compression and make adjustments
| Term | Description |
|---|---|
| Input Gain | Adjusts the amplitude at which the audio enters the compressor |
| Output Gain | Compensates for volume loss due to compression |
| Gain Reduction Meter | Displays the amount of gain reduction in real-time |
Remember, it’s crucial to understand how to properly set your input gain, output gain, and monitor the gain reduction meter. This will help you achieve optimal compression results and maintain the quality of your audio signal. So next time you’re working with compression, keep these tips in mind and make the most of your audio engineering skills!
Role of Audio Engineers and Sound Designers
As an aspiring audio professional, it’s essential to understand the roles of both audio engineers and sound designers in the world of music production. These experts use their skills to shape the sonic characteristics of a project, creating immersive experiences that resonate with listeners. Let’s dive into their responsibilities and how they work together to create top-notch audio content.
Audio engineers are the technical wizards of the audio world. They’re responsible for capturing and manipulating the sounds from various sources like microphones, instruments, and synthesizers. Their expertise lies in adjusting the audio levels, compression, EQ, and reverb, resulting in a well-balanced and polished mixes source. They work closely with sound designers, ensuring that the audio components meet the desired artistic vision.
Sound designers, on the other hand, are the creative forces behind the audio content. Their primary objective is to ideate, develop and edit sounds that enhance the project’s narrative source. In collaboration with audio engineers, they sculpt the sonic characteristics and contribute atmospheric effects, providing a unique identity to each project source.
Here are some key responsibilities of audio engineers and sound designers:
Audio Engineers:
- Recording and mixing audio tracks
- Managing audio equipment during live performances
- Aligning audio elements with visual content
- Mastering final audio mixes
Sound Designers:
- Creating innovative sound effects and textures
- Developing cohesive soundscapes for a project
- Curating and editing audio samples
- Collaborating with the creative team to enhance storytelling
Together, these specialists cover various aspects of music production:
- Live sound – ensuring optimal audio quality during performances
- Studio recording – capturing artist performances for editing and mixing
- Post-production – refining and polishing the audio content
- Interactive media – designing soundscapes for video games and other digital experiences
In conclusion, both audio engineers and sound designers are integral components of the music production process. As an aspiring audio professional, familiarizing yourself with the responsibilities and collaborative dynamic between these two roles can help you establish your niche within the industry and create exceptional audio experiences for your listening audience.
Conclusion
In the world of audio engineering, compression plays a crucial role in managing the dynamic range of a signal. Its main aim is to balance the volume between the quiet and loud parts, ultimately enhancing the overall sound quality.
As an aspiring audio engineer or simply an enthusiast, understanding how compression works can benefit you in various situations. Remember that choosing the right settings for your compressor, such as attack and release times, will make a significant difference.
Remember, it’s all about achieving the desired sound while retaining the nuances that make the audio authentic.
Finally, practice is key; the more you work with compression, the better you’ll become at perfecting your craft. Keep experimenting, and trust your ears!