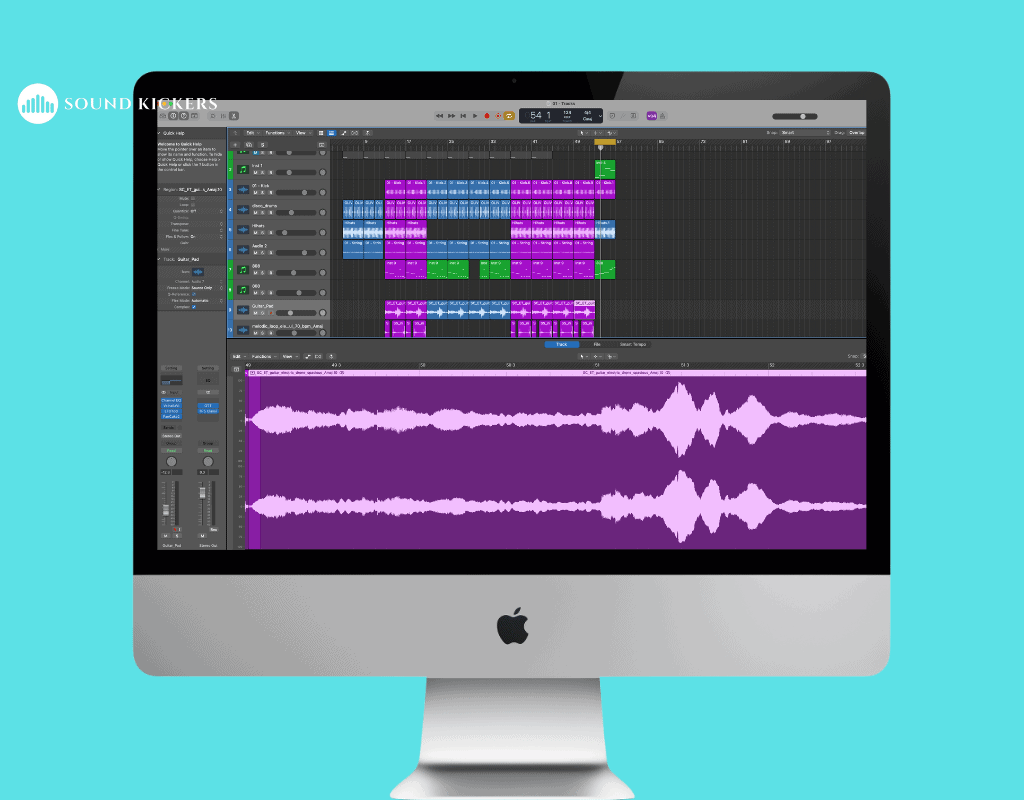
15 Powerful Logic Pro X Beginner Tips You Must Know
If you’re starting with music production tools, it can feel overwhelming. From tracks to regions to all the settings to the terminology, it’s a mind-boggling endeavor.
But with our 15 Logic Pro X beginner tips, you’ll be able to get started quickly and learn tricks to make music production a breeze.
Let’s get started!
15 Logic Pro X Beginner Tips

#1 Use Key Commands
Logic Pro X comes with a bunch of key commands, and it can take a while to get the hang of them all.
However, the below are the most useful, to begin with:
- r — record
- spacebar — stop/play
- cmd + z — undo
- ‘ — rewind to the previous measure
- . — fast forward to the next measure
- cmd + shift + z — redo
- cmd + c — copy
- cmd + v — paste
- enter — rewind to the beginning of the song
#2 Track Alternatives
Do you want to try various approaches to certain parts of your track with a particular instrument?
If so, you might add multiple copies and utilize the Solo and Mute buttons to hear the differences.
But there’s a much easier method.
Use the “Track Alternatives” feature.
It lets you try numerous ideas before selecting the one you want to stick with.
#3 Stacked
Logic’s Track Stacks make it easy to group complementary sounds for effortless mixing.
For example, any auxiliary effects put on a Stack will equally affect everything in the group.
Choose the individual tracks you want to group, right-click, and select the “Stack” option from the dropdown.
#4 Import Effortlessly
You don’t have to leave your current project to import sounds, MIDIs, or automation data from other projects.
Here’s how to do it:
#5 Flex Mode
The selected regions will appear in your current project, allowing you to move, edit, and place them wherever you want.
If you want to make unique, glitchy beats, enable Flex Mode and select “Tempophone” as the Flex algorithm.
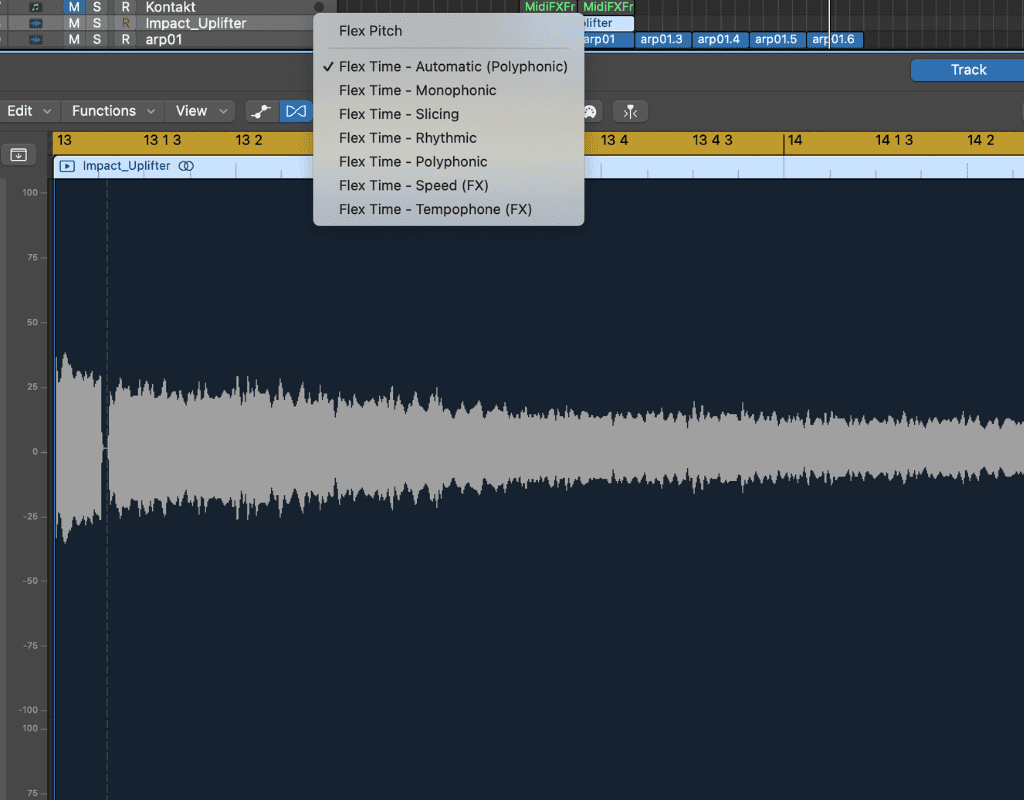
Click an audio region to craft Flex Markers, pulling them around to create low- and high-speed portions.
You can select various grain sizes in the left-hand panel to add an extra layer to your beat track.
#6 Colors and Icons
Every track and region can have its color for optimal organization.
To bring up the color panel, click on the region or track you want to color and hold “Option + C” on your keyboard. Then, select the color you want.
You can also change the track’s icon by right-clicking the waveform and selecting a more appropriate symbol.
#7 Adding Fades Is Easy
Fades cut out any buzz at the beginning of instrument tracks.
Look in the left-hand column next to the track for the words “Fade In.”
Click and drag up alongside the words to create a longer fade; drag down for a shorter one.
You can also change the curve below the fade section to craft a more sudden or slower fade.
#8 Quick Copy
While “cmd + c” and “cmd + v” are shortcuts for copying and pasting regions, there’s an even quicker way utilized by almost all producers.
Hold the “option” on your keyboard, click the region you want to copy, and drag it to where you want it to land.
It won’t affect the placement of the original region, and it creates a copy to play with.
#9 Transpose Audio
You can quickly switch the key of any track by selecting the region, holding down the “option,” and using the up or down arrows on your keyboard.
To change the octave of a track, do the same as above but hold “shift” as well.
#10 Jumping Over Deleting
You can experiment with your track by jumping instead of deleting portions. After all, deleting sections is quite drastic if you’re still making up your mind!
Cycle through the section you want to skip past for the next play-through and reverse the positions of the locators.
When you play the track back, it will jump over that section, letting you hear your song without it.
#11 Take Advantage of Project Alternatives
You don’t have to save multiple Logic projects under different file names for the separate versions of the same song.

Instead, go to “File” then “Project Alternatives.”
This technique keeps all the versions of the same project active, allowing you to switch between them rather than loading a new session.
#12 Using Your Own Samples
From the instrument panel, hit “Quick Sampler.”
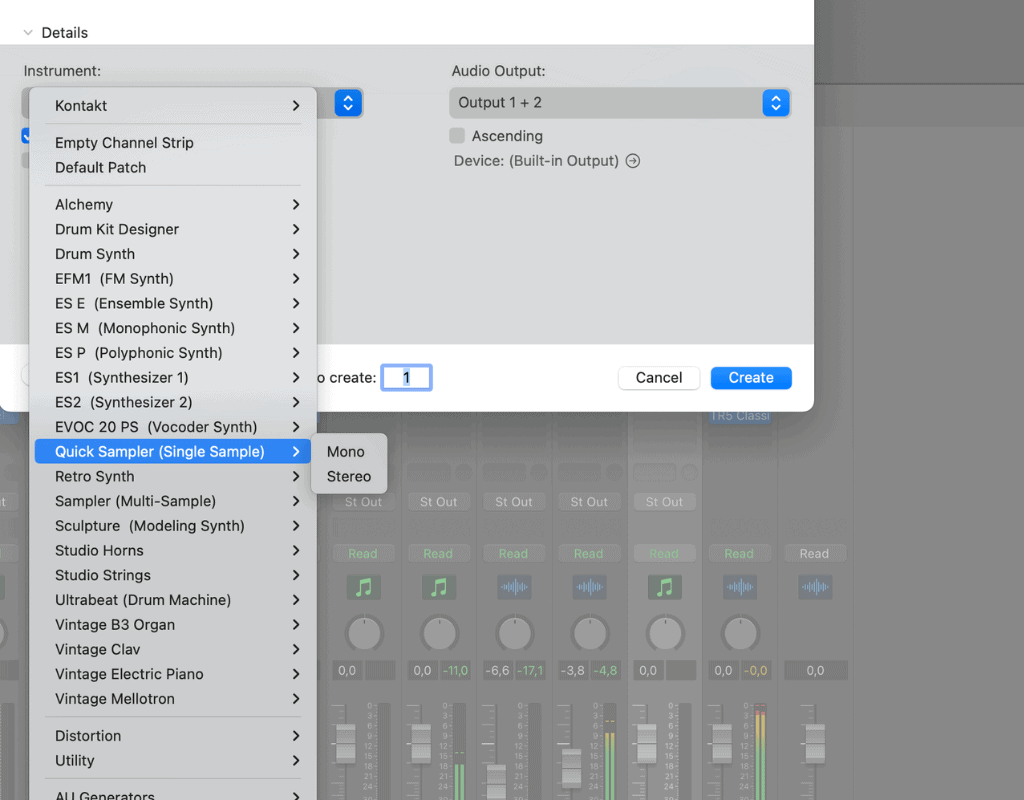
This tool allows you to drag and drop your samples, automatically pitching it up or down to match your current project.
#13 Automation
You can automate individual regions or complete tracks.
For example, you can choose “Region Automation” if you want a filter movement to repeat on every bar of a synth.
Alternatively, you can select “Track Automation” if you want a synth to fade out or in over a longer period.
Although, be aware that you’ll need to draw the fade curve in.
#14 Don’t Ignore The Region Editor
Every region has its own editor in the project screen’s top left.
Clicking on different regions will change the options in the editor.
You can do a lot within that small panel alone, so it’s good to familiarize yourself with all the options.
For example, the region editor for vocal tracks allows you to mute, loop, transpose, fine-tune, use flex time, gain, and more.
#15 Saving Presets
If you’re creating your own effects and want to reuse them in other projects, saving presets is vital.
Luckily, the process is straightforward.
Head to the uppermost dropdown menu of whatever Logic Pro X tool you’ve created the sample in and click “Save As.” Rename the sample descriptively and save it.
You’ll find it within the platform’s dropdown menu the next time you want to add the same effect to your track!
Final Thoughts
We hope you can use the Logic Pro X beginner tips and tricks listed above.
Stay tuned as we will keep updating this article with more information.
Thanks for reading and comment below if you want us to cover more Logic Pro X topics.